11.28.2011

Peppered Buttermilk Biscuits

.  Hello again, all!  How was everyone's Thanksgivings?  I know over our way we had too much food, too many laughs, and too much shopping [even though I'm positive none of those are even possible].  But all in all, the best long weekend.


As I mentioned, we spent the holiday near Chicago at my aunt and uncle's house.  It was an absolute perfect time, and I can strongly say that we don't get to see them enough.  For Thanksgiving, my aunt managed to make enough food for a small army and we spent the next three days eating the delicious leftovers.  And I kid you not, three days.  We finally put out on the counter Saturday night [the night before we all left] every last morsel of food and we all managed to make our own contributions in making it all disappear.  I was forced, I tell you.  Oh, and I found my new staple at every Thanksgiving from here on out: Sweet Potato Casserole.  Uhh, hello, why has no one ever told me about this ridiculously good tasting dish?  I think my relatives may have secretly hid it from me so I wouldn't eat it all.  Good thinking...

Anywho, we also did our fair share of Black Friday shopping, got in a couple games of volleyball at the gym, and a lot of time just enjoying each other's company.  It's a rare occurrence that we're able to get together, so we have to make the most of it, right?!  Right.


So I'm back in Omaha now, back with my three puppies who I missed dearly.  I must say, they've never been so excited to see me before.  Ollie actually kissed me on the face multiple times.  I think our relationship is getting better.  But being back also means getting back into the routine of things [a.k.a work and actually working out a time or two] and also making easy meals with those leftovers!  So for this post, I thought it would be perfect timing for a superb biscuit, one that, alone, is beyond any other biscuit I've ever made but also one that would make outrageous turkey sandwiches.  Orrrr any other type of sandwich using the Thanksgiving leftovers.  I'll let you get creative.  This recipe comes from the the one and only, Bobbly Flay, the recipe he used to win a biscuits and jam throwdown on Throwdown with Bobby Flay.  Mmhmm, so it's gooooood.  Buttery, flakey, and a slightly crunchy exterior surrounding a tender, soft interior.  They're making my mouth water just thinking about them!  Oh, and they're surprisingly easy.  I promise.  So have at 'er!  .

My Notes:
  • If possible, use a food processor for this recipe.  Handling the dough the least amount with your hands will yield the best results.  But I obviously realize not everyone has one, so just take mind when handling the dough.  Be gentle!
  • I wanted larger biscuits, so I used 3-1/6-inch cookie cutter to cut out the biscuits, which made 1 dozen (baked at 450°F for about 18 minutes).  However, I put the original directions below, whatever you use depends on your preferences.


From Bobby Flay

Ingredients:
4 c. all purpose flour
4 tsp. baking soda
1 tsp. salt
12 tbsp. cold unsalted butter, cut into small pieces
1-1/2 c. cold buttermilk
1/2 c. heavy whipping cream
Ground pepper (for sprinkling)

Directions:
1.  Heat oven to 450°F and line a baking sheet with parchment paper.  Combine flour, baking powder, baking soda, and salt in large bowl (or food processor by pulsing).  


2.  Cut in butter using pastry blender (or pulsing) until mixture resembles coarse meal.  Add buttermilk and gently mix until mixture just comes together.


3.  Gather dough together and place onto lightly floured surface.  Pat dough into 10x12-inch rectangle about 3/4-inch thick.  Use a 2-inch round cutter to cut out biscuits (don't twist cutter, pull straight up).


4.  Use a 2-inch round cutter to cut out biscuits (don't twist cutter, pull straight up).  Press together scraps and repeat.


5.  Place biscuits onto prepared baking sheet.  Brush tops with heavy whipping cream and sprinkle with pepper


6.  Bake 12 to 15 minutes or until lightly golden brown.  Transfer biscuits to wire rack to let cool.


Yield: 2 dozen biscuits

11.24.2011

All in a Word

for time together, turkey talk, and tangy weather
H  for harvest stored away, home and hearth and holiday
A  for Autumns frosty art, and abundance in the heart
N  for neighbor and November, nice things, new things to remember
K  for kitchen, kettle's croon, kith and ken expected soon
S  for sizzles, sights and sounds, and something special that abounds

That spells THANKS for joy in living
and a jolly good Thanksgiving .


See you all next week!

11.21.2011

Secret Recipe Club: Christmas Cake Truffles

. Third time really is the charm.


Don't get me wrong, I was elated with my first two SRC assignments, which produced the Danish Puff and Victoria Sponge Cake.  Both were outrageously delicious and I had such a good time perusing the blogs.

But this time around, the blogger herself, Gloria from The Ginger Snap Girl, truly intrigued me.  Why you ask?  Well we have quite a number of [odd] things in common, which I realized while reading her 'About Me' page.  Let me demonstrate:
  • Gloria has three cats and I have three dogs!  First off, I don't know many people with three of anything.  And second, we both have animals named Oliver!  Crazy.
  • Gloria's husband is from Chicago [hello, my all time favorite city!] while Gloria is from California [whaaaat, my all time favorite state!].
  • Gloria's family LOVES food.  Hmm, I vividly remember mentioning my family's passion for food in one my of posts.  Oh yes, yes I did.  But Gloria didn't really hone her cooking skills until college.  What the...neither did I!!  Sophomore year to be exact.
  • Last but not least, Gloria began blogging in early 2010.  Okay, let's just take a gander over at my archives.  Yep, that's exactly when I started as well.

Is this weird or am I just imagining things?  Pretty amusing to me and needless to say, I loved browsing through Gloria's recipes, which include both baking and cooking dishes.  I have to admit, I was tempted to make some of Gloria's savory dishes for this SRC post because they just sounded so amazing.  Chicken Piccata [I adore capers), Cheeseburger-stuffed Mushrooms, Cheese and Chive Bread, and Garlic Basil Shrimp with Orzo Pasta.  Gah, mouth watering.

But I forced myself to stick to LSM's roots.  And of course, Gloria didn't lack any sweet recipes.  I debated between several items: Chocolate Chubbies, Chocolate Truffle Cookies, or Chocolate Malted Layer Cupcakes.  Obviously the chocolate bug was creeping around...but I ultimately decided on the irresistible Christmas Cake Truffles.  Why?  Well, they're absolutely perfect for the season, duh.  And I've also been dying to make cake balls for some time now but have never gotten around to it.  So here was my chance.  Gloria also provided a beautiful step-by-step tutorial, which was greatly comforting for my first attempt at cake ball-making!


And the results?  Little mounds of rich perfection.  Seriously, if you've never had a cake ball/truffle, you are missing out.  Big time.  These lovelies are truly truffle like, actually not what I was expecting in the least.  The centers are creamy, made so by a mixture of soft red velvet cake and a coconut-marshmallow cream cheese frosting.  And what's a truffle without some chocolate?  Mmhmm, the centers are encased by a layer of scrumptious chocolate.  Cake, special frosting, and chocolate all in one bite.  What's not to love?!

Yet again, I had a fabulous time getting to know a fellow blogger.  Thanks Gloria for the wonderful recipe and tutorial, I can't wait to share these with everyone! .


My Notes:
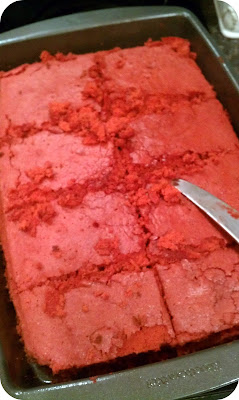
  • Gloria's recipe called for a boxed cake mix and store-bought frosting, but she mentioned you could use a from-scratch recipe as well.  I opted to use my Red Velvet Cake, the one Robbie made me for my birthday, simply because I loved it so much and knew it would be great.  And it was more than great!  So if you decide to use my recipe, hop on over to the post for directions on how to make the cake and frosting.  It's a fun one, too, there's videos!  Otherwise, reference Gloria's ingredients and directions below.
  • If you decide to use my recipe, you'll also need 2 ounces of red food coloring for the cake.  I put the batter into a 13x9-inch pan and baked at 350°F for 30 minutes, which is when a toothpick inserted in the center of the cake came out clean (from here, pick up at Step 2 below).  While the cake is cooling, make the frosting.  And if you're not a coconut fan, feel free to leave that out of the frosting.  Not saying I encourage you to do so [you'll regret it], but you know, just in case.  I used about 2 cups of the frosting for the filling.
  • For some reason, the filling started to pop out through the chocolate a little bit.  It seems like there was some moisture, so some of the cake balls cracked slightly [see pictures below].  This doesn't effect their outrageous taste whatsoever, but just giving you the heads up! 
  • I realized that this recipe is an ABSOLUTE perfect family activity on say, oh, Christmas Eve?!  Once the filling is ready, everyone can cover and decorate their own cake balls.  What a fun little night!
From The Ginger Snap Girl

Ingredients:
1 box red velvet cake mix (and ingredients on box to prepare cake)
1 container cream cheese frosting
2 (14 oz.)  bags dark cocoa candy melts
Additional candy melts, sprinkles, gels, etc. for decoration

Directions:
1.  Mix and bake cake mix according to box instructions.  Let cool.


2.  Once cooled, cut cake into sections and place cake into food processor.  Pulse until cake is crumbly (or, you can use your hands, fork, etc.).  Place crumbs into a large bowl.


3.  Add about 2/3 of the canned frosting to the cake crumbs and mix to completely combine, until you have a fudge-like consistency.


4.  Using a medium-sized scoop or tablespoon, scoop dough and place cake balls onto parchment- or foil-lined baking sheet (make sure that whatever you place the cake balls on can fit into your freezer!).  Take each ball and roll in hands to form a smooth ball and place back on baking sheet.  Place baking sheet in freezer for 1 hour.


5.  Once ready to decorate, place chocolate candy melts into large bowl and melt in microwave (heat at 30-second intervals until completely melted and smooth).  

PLEASE NOTE! 
If you're using sprinkles, make sure to have the sprinkles ready to use.  The chocolate melts very quickly, so you must decorate the cake balls immediately after covering in chocolate.  I found it best to set up a short assembly line: dip in chocolate, place on parchment paper, and cover with sprinkles.


6.  Place one cake ball into bowl and using two forks, roll ball in chocolate to cover completely.  Using the forks, take cake ball out of bowl, letting excess chocolate drip off, and place onto parchment paper.  Decorate as desired.  Let cake balls set (only a minute or two).


Yield: about 60 cake balls


11.19.2011

White Chocolate Cranberry Blondies


. I ❤ the holidays.  Simple as that.  And if anyone says they don't, they be crazy.

Even though this next month or so will be quite busy [a.k.a. stressful] due to work, the holidays make it all worth while.  The decor, the cheer, friends and family, and of course, the food!  Oooo, the scrumptious food we'll consume within the coming month [or at least I will be!].  To me, what makes it all better [and justifies eating one more plate full of potatoes, stuffing, turkey, and rolls], is that it's ONCE a year.  Just once, so you better take full advantage.  And I know I will.  Don't fret.

I mentioned that I'll be meeting my family in Chicago this year for Thanksgiving to spend the long weekend at my aunt and uncle's.  And when the Wakasugi's get together, there's usually a large amount of food at every turn.  And when I say large, I mean ridiculous.  In the best kind of way though.


So, there will be eight of us at the dinner table.  But the spread will most likely end up looking like a feast for oh, 17.  Not that I'm complaining one bit, it's one of the things I absolutely love about getting together with my relatives.  The sheer love, [dare I say] joy, and happiness that radiates from everyone.  I can't get enough of it.  Accompanied by the one-time-a-year dishes that I also can't get enough of.  Mm.  Mm.  Mm.  Okay, Thanksgiving can get here already.

You may remember my ICC post for Mini Pumpkin Pie Cheesecakes, and if you don't, take a gander.  They're worth the click.  But I know for most families, one dessert just isn't enough.  I mean, c'mon, we just got done talking about eating just a little too much, simply because Thanksgiving gives us that right of passage.  It's written in the 'rules of life' somewhere.  And to boot, the Mini Pumpkin Pie Cheesecakes are, well, mini.  Which leaves just the right amount of room in our tummies [yes, I'm five], for one more item.  Or at least until we sleep everything away and wake up to another plate full of goodness.

So if we're going to cram one more thing in our mouths, then it best be worth it.  Right?  Well these suckers are.  Baaa-lieve me!


White Chocolate Cranberry Blondies.  I was sold by the name on it's own, since there was no picture of these delectables in the book I discovered them in.  Gah, these are good.  GoOooOOod.  An uber chewy blondie base encases pops of tart cranberries and crunchy white chocolate chips.  Alone, these bars are outstanding.  But we want more than just outstanding, we need Thanksgiving approved, hello!  So let's go ahead and top the bars with a smooth, rich white chocolate cream cheese frosting.  Woo, take me to heaven! .


My Notes:
  • Just to add a little flavor twist, I used cherry-flavored cranberries and they were fantastic!  However, the original recipe just called for regular dried cranberries.  
  • I opted to not use it, but the original recipe also used 1 tablespoon of grated orange peel.  Either way, these are a winner!


Ingredients:
Bars:
3/4 c. butter, cubed
1-1/2 c. packed light brown sugar
2 eggs
3/4 tsp. vanilla extract
2-1/4 c. all purpose flour
1-1/2 tsp. baking powder
1/4 tsp. salt
1/8 tsp. ground cinnamon
1/2 c. dried cherry-flavored cranberries
6 oz. white baking chocolate, coarsely chopped

White Chocolate Cream Cheese Frosting:
1 (8 oz.) package cream cheese, softened
1 c. powdered sugar
6 oz. white baking chocolate, melted
1/2 c. dried cherry-flavored cranberries, chopped

Directions:
1.  Heat oven to 350°F.  Grease a 13x9-inch pan with nonstick cooking spray.  For the bars, in a microwave-safe bowl, melt the butter.  Whisk in light brown sugar and let cool to room temperature.


2.  Whisk in eggs and vanilla extract.


3.  Combine the flour, baking powder, salt, and cinnamon.  Gradually add the dry ingredients to the butter mixture.


4.  Stir in cranberries and chopped white chocolate (batter will be thick).


5.  Spread the batter into prepared pan.  Bake 18 to 21 minutes or until toothpick inserted in center comes out clean (do not over bake).  Let cool.


6.  For frosting, in a large bowl, beat cream cheese, powdered sugar and orange peel (if using) until blended.  Gradually add in half of the melted white chocolate and beat until blended.


7.  Frost blondies.  


8.  Sprinkle with cranberries and drizzle with remaining melted white chocolate.


Yield: 2 dozen bars

11.17.2011

The Improv Cooking Challenge: Mini Pumpkin Pie Cheesecakes


. You all know how much I absolutely adore the baking/cooking challenges I am a part of (i.e., SRC and ICC), right?  Well I am, they're something I look forward to every month because it's a chance for me to really dive into the baking world.  Both being introduced to fellow bloggers and getting to tap into my creative side (no matter how hidden it may be!).

But this time around, I bring you a post I am oh-so-happy about but in the meanwhile, a little gray cloud also hangs.  In my first ICC post, I introduced you all (if you didn't happen to already know her) to Sheryl from The Lady Behind the Curtain.  She was the founder of ICC and the passion she held for the idea simply radiated from her blog.  However, due to personal circumstances, Sheryl had to leave behind both her blog and ICC.  It was a sad moment when I received her e-mail, letting all of the participants know that ICC would no longer be.


So what the heck am I doing with a second ICC post?  Fortunately, Kristen, from Frugal Antics of a Harried Homemaker, swooped in to save the day.  Later that same morning, Kristen sent out an e-mail to the ICC participants, offering to continue ICC through her own blog.  WHAAT!?  YESSSS!  As much as we will all miss Sheryl's amazing words, I think I can say for most bloggers that we are so ecstatic that Kristen decided to keep ICC in the mix.

So here I am with my November ICC post, and the secret ingredients?

Pumpkin and Cream Cheese 

Gosh dang it, those are some fab ingredients, huh?  The possibilities are endless and I can't even begin to tell you how many ideas flashed through my mind when attempting to decide what to bake.  But to help myself out, I narrowed down the options to something that would serve a dual purpose: a pumpkin/cream cheese treat for ICC and a goodie that would be perfect in anyone's Thanksgiving spread.  Which brings us to the shining star of this post, my very own Mini Pumpkin Pie Cheesecakes.


So what are these little guys anyway?  Well, they're a combination of pumpkin pie and cheesecake!  The buttery crust and pumpkin flavors from a traditional pumpkin pie and the wonderful lusciousness we have come to love about cheesecakes.  Pretty straightforward, eh?  But trying to figure out exactly how to make these was definitely not straightforward.  I'll tell you that I spent a good amount of time Googling and researching exactly how to put together pie crust and cheesecake.

What type of crust should I use?  Flakey?  Shortbread?  Do I pre-bake the crust?  Or will it end up burning since cheesecake bakes for quite awhile?  How big should I cut the pie crusts?  What types and amounts of spices do I use to get that pumpkin pie flavor?  How long do mini cheesecakes bake?  When do you know to take them out of the oven?

These and about, oh, a bajillion more questions rushed through my mind.  It was a lot to think about but I think after nailing down what recipes I wanted to use, everything went rather smoothly.  If I do say so myself ☺


I absolutely love how this recipe gives you individual servings of dessert.  We all know how much we tend to eat on Thanksgiving [or at least I do...], so these will give you the hit ending to a stuff-you-silly dinner without knocking you into a complete food coma.

Finally, I just want to say thanks again to Kristen for picking up ICC.  I had a great time with this months' ingredients and can't wait for December! .


My Notes:
  • The pie crust recipe below yields four individual pie crusts or two double-crust pies.  That's a lot of crust!  But don't worry, you can freeze the remaining dough you don't use [mine is definitely in the freezer] for 2 to 3 months and use it later for something else.
  • If you don't have any shortening around, you can use 1 cup of unsalted butter.
  • To me, cutting shapes out of pie crust was very intimidating.  But I attempted leaves this go around and I can vouch that it's not hard in the least!  It's actually rather simple and makes any dessert look extra special!
  • Since I created this recipe from several sources, you'll have a lot of cheesecake filling left over.  However, you can always use the left over dough and filling to make more mini pumpkin pie cheesecakes.  
  • If you don't have the time to make these individual cups, the entire recipe will make enough for a 9-inch pumpkin pie cheesecake.  Make the crust, place it in the pan, pour in the entire cheesecake mixture, and bake at 325°F for 1 hour.
  • I initially baked these yummies for 30 minutes at 325°F and thinking they were done, took them out.  But, they definitely were still a little underdone so I popped them back in the oven for 20 additional minutes at 350°F.  So, please note!, my time stated in the recipe is a guesstimate, so make sure to check on your pies around 40 minutes or so just to be safe.


Ingredients:
Crust:
3 c. all purpose flour
2 tsp. sugar
3/4 tsp. salt
1/2 c. unsalted butter, cut into chunks
1/2 c. butter-flavored shortening
1 large egg
4 to 8 tbsp. ice water
1 tbsp. lemon juice

Pumpkin Cheesecake:
3/4 lb. (one and a half 8 oz. packages) cream cheese, softened
3/4 c. sugar
3/4 c. firmly packed light brown sugar
5 large eggs, at room temperature
1-1/2 c. canned pumpkin puree
3/4 c. heavy whipping cream
1-1/2 tsp. ground cinnamon
1-1/2 tsp. ground ginger
Pinch of ground cloves
Pinch of nutmeg

Garnish:
Whipped cream (homemade or store-bought)

Directions:
1.  For crust, place flour in food processor (or large bowl).  Add sugar and salt and process for 20 seconds to combine.  Cut in butter by pulsing (or using pastry blender or fingers) until mixture looks crumbly.


2.  Add egg and drizzle ice water and lemon juice on top.  Turn on food processor for 15 seconds (gently mix crust with fingertips) until mixture just holds together.  Turn out dough onto lightly floured surface and gently knead for a few seconds to smooth out dough.


3.  Divide dough in half and pat into flattened disks.  Wrap well in plastic wrap and chill for at least 1 hour or overnight (this is when the dough can be frozen until you need it for something else).


4.  Grease a standard muffin pan with non-stick cooking spray.  Take one disk from the refrigerator and roll out to about 1/8-inch thick.  Cut out circles of dough roughly 1-inch wider than the muffin tin (using a cookie cutter or top of glass).  


5.  Place cut outs into muffin pan, using fingertips to gently form the crust to the pan.


6.  If desired, use the second dough disk to cut out shapes to adorn the cups.  You can also use the remainder of the second disk to make additional mini crusts to fill.


7.  Heat oven to 325°F.  For cheesecake, in a large bowl beat cream cheese with electric mixer on low speed until very smooth.


8.  Gradually add sugar and brown sugar.  Add eggs, one at a time (scrape down sides of bowl as needed).  Add the pumpkin puree and mix until just blended.


9.  Stir in heavy whipping cream, cinnamon, ginger, cloves, and nutmeg.


10.  Fill crusts with cheesecake mixture until just barely full.  Bake 45 minutes or until cheesecakes are set and crusts are golden brown.


11.  When cheesecakes are done, turn off heat and prop open oven door to let the cheesecakes cool for 1 hour before removing from oven (do this step, it will help avoid cracks in the top of the cheesecakes).


12.  Garnish cheesecakes with whipped cream before serving.


Yield: 9 mini cheesecakes